

How to connect external signals to the X1 welding machine?
Summary
The instructions below show you how to connect the following signals:
a) Line control
b) Error powder unit
c) Release powder
Line control
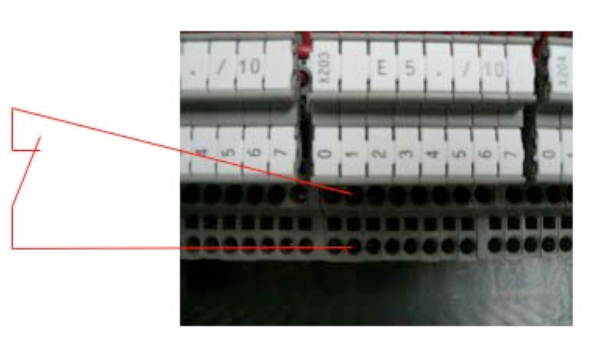
In order to switch off the downline due to an error, the PLC has a prepared input. To use this input, we need a potential-free signal from the downline, which is closed when the line is ready. Use the terminal E5.1 to connect the line control.
As soon as an error occurs, the de-stacking of the sheets stops and after an adjustable delay the wire-run and the remaining drives. The can body transport continues to run slowly. This mode plus the flashing of the key „Production ON“ shows the operator the status of the line stop.

ATTENTION:
Machine begins to produce independently again, respectively after the release of the line control.
Error powder unit
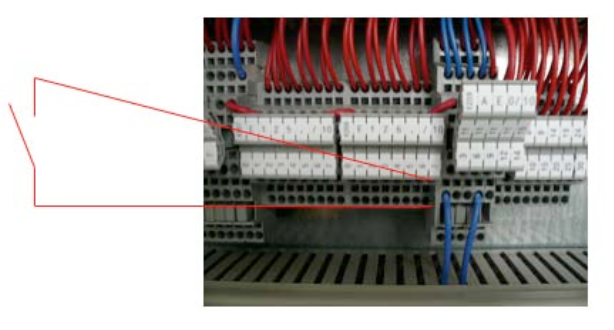
This input should be connected the same way as the line control. Here as well we need a potential-free relay contact of the powder unit. But this contact needs to be open, if there is any error. This signal needs to be connected to E126.7.
The production shuts off, if an error occurs. After that the operator needs to switch on the machine.
Release powder
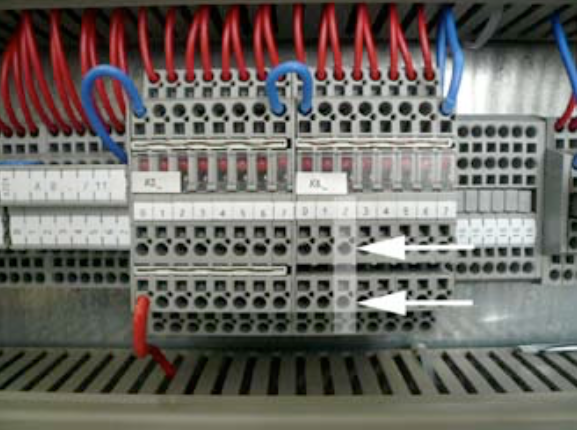
In order to switch on the powder, we provide a change-over contact. The contact switches as soon as the production or a single can is triggered. In order to provide enough time for the initialization of the powder, the de-stacking is delayed by an adjustable time. Before you connect this signal, you have to remove the comb bridge (1) and the link (2), in order to make the contact potential-free.
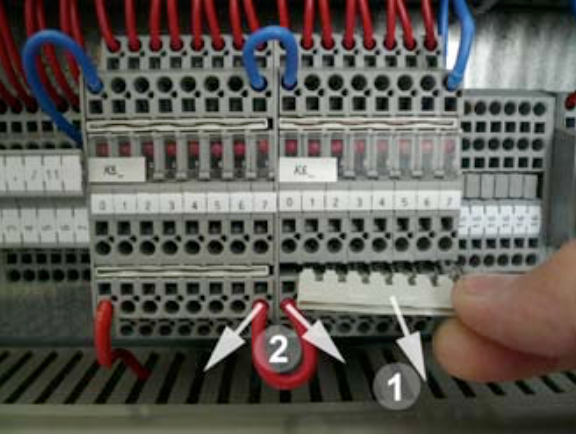
Use the terminal K6.2 (A124.2).
NOTE:
Consult the electrical scheme of your welder to double-check the various input signals. In case you are not successful with the connection, contact a CANMAN electrician.